Custom Search
Showing posts with label Troubleshooting. Show all posts

Show/Hide Run command from Start Menu

One of our member asked that Run Command is not showing to his Start Menu.

Run Command box is an important part of Operating System. Whether for running applications or Registry editing. For changing startup setting or running Group policy editing. Every software/data present in your PC could be run/opened with Run command box.

In some cases it could be hided by some naughty friend of yours or by some virus infections.

You may want to hide it for protecting your system from someone to change important setting of your PC.

Here is the step by step guide to hide/Show Run Command box from Start Menu.

  • Right click on TaskBar to open Taskbar Menu and select Properties to open Taskbar Properties.

Taskbar Menu

  • Taskbar Properties window will be opened.Select StartMenu tab and click on Customize.

Taskbar Properties

  • Customize Start Menu window will be opened. Select Advanced tab and Check (√) “Run Command” checkbox to show and uncheck it to hide “Run Command”from Start Menu.

Hide show Run from Start Menu

  • Click on Ok button and its done.

Enable/Disable Windows Task Manager

Task Manager provides information about programs and processes running on your computer. It also displays the most commonly used performance measures for processes.

You can use Task Manager to monitor key indicators of your computer's performance. You can see the status of the programs that are running and end programs that have stopped responding. You can also assess the activity of running processes using as many as fifteen parameters, and see graphs and data on CPU and memory usage.

In addition, if you are connected to a network, you can view network status and see how your network is functioning.

If you have more than one user connected to your computer, you can see who is connected, what they are working on, and you can send them a message.

Sometimes it got disabled by viruses and you cannot use it.

To Disable/Enable Windows Task Manager

  • Click Start and then Click Run.

Start Button

  • Type gpedit.msc in Run, and click the OK button.

services.msc

  • The Group Policy Window will appear. Now click on the “+” sign of Administrative Templates( or double click) under User configuration in the left columns to expand it and then again click on the “+” sign of System under Administrative Templates to expand it.select/click Ctrl+Alt+Del Options (see the image below).
  • Now double click on “Remove Task Manager” in the right column to open its properties. (as shown in the picture)task manager
  • Then select Disabled radio button from Remove Task Manager Properties to enable it OR Enabled to disable windows Task Manager.Click the OK button. (as shown in the picture).Enable Windows Task manager
  • It Done.

Important Note:

Above method is for Windows XP Professional users.If you are using Windows XP Home or you are having trouble with above method you may download this small utility to enable it.

Running Windows in Safe Mode

If your computer will not start, you might be able to start it in safe mode. In safe mode, Windows uses default settings (VGA monitor, Microsoft mouse driver, no network connections, and the minimum device drivers required to start Windows).

If your computer will not start after you install new software, you might be able to start it with minimal services in safe mode and then change your computer settings or remove the newly installed software that is causing the problem. You can reinstall the service pack or the entire operating system, if necessary.
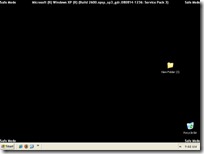
Windows Safe Mode

If a symptom does not reappear when you start in safe mode, you can eliminate the default settings and minimum device drivers as possible causes of the computer's inability to start.

  • In safe mode, you have access to only basic files and drivers (mouse, monitor, keyboard, mass storage, base video, default system services, and no network connections). You can choose the Safe Mode with Networking option, which loads all of the above files and drivers and the essential services and drivers to start networking, or you can choose the Safe Mode with Command Prompt option, which is exactly the same as safe mode except that a command prompt is started instead of the graphical user interface. You can also choose Last Known Good Configuration, which starts your computer using the registry information that was saved at the last shutdown.
  • Safe mode helps you diagnose problems. If a symptom does not reappear when you start in safe mode, you can eliminate the default settings and minimum device drivers as possible causes. If a newly added device or a changed driver is causing problems, you can use safe mode to remove the device or reverse the change.
  • There are circumstances where safe mode will not be able to help you, such as when Windows system files that are required to start the system are corrupted or damaged. In this case, the Recovery Console may help you.
  • NUM LOCK must be off before the arrow keys on the numeric keypad will function.

To start the computer in safe mode

  1. You should print these instructions before continuing. They will not be available after you shut your computer down in step 2.
  2. Click Start, click Shut Down, and then, in the drop-down list, click Shut down.
  3. In the Shut Down Windows dialog box, click Restart, and then click OK.
  4. If you have only installed one operating System then just after boot screen disappear (the logos that you see when you start computer eg Dell,HP, Intel or other) OR after boot process information (When the message “Press F2/Del key to enter setup” or any other similar message gone) Press F8 and proceed to step 7.
  5. OR When you see the message Please select the operating system to start, press F8.
  6. If you have a dual-boot or multiple-boot system, choose the installation that you need to access using the arrow keys, and then press ENTER.
  7. Use the arrow keys to highlight the appropriate safe mode option, and then press ENTER.

The Safe Mode Options are:

  • Safe Mode

Starts using only basic files and drivers (mouse, except serial mice; monitor; keyboard; mass storage; base video; default system services; and no network connections). If your computer does not start successfully using safe mode, you might need to use the Recovery Console feature to repair your system.

  • Safe Mode with Networking

Starts using only basic files and drivers, and network connections.

  • Safe Mode with Command Prompt

Starts using only basic files and drivers. After logging on, the command prompt is displayed instead of the Windows graphical interface.

  • Enable Boot Logging

Starts while logging all the drivers and services that were loaded (or not loaded) by the system to a file. This file is called ntbtlog.txt and it is located in the %windir% directory. Safe Mode, Safe Mode with Networking, and Safe Mode with Command Prompt add to the boot log a list of all the drivers and services that are loaded. The boot log is useful in determining the exact cause of system startup problems.

  • Enable VGA Mode

Starts using the basic VGA driver. This mode is useful when you have installed a new driver for your video card that is causing Windows not to start properly. The basic video driver is always used when you start in Safe Mode (either Safe Mode, Safe Mode with Networking, or Safe Mode with Command Prompt).

  • Last Known Good Configuration

Starts using the registry information and drivers that Windows saved at the last shutdown. Any changes made since the last successful startup will be lost. Use Last Known Good Configuration only in cases of incorrect configuration. It does not solve problems caused by corrupted or missing drivers or files.

According to your selection windows will be loaded in safe mode.

After windows Start in safe mode you will receive a message. If you want to use System Restore to restore your computer at an earlier stage click NO otherwise click YES button.

Enabling Internet Explorer add-ons

What are Web browser add-ons?

Web browser add-ons add features (for example, extra toolbars, animated mouse pointers, stock tickers, and pop-up ad blockers) to your web browser.

Some websites will not browse correctly if their required add-ons are not installed or they get disabled.

Internet Explorer add-on disabled

For example a website with flash content will not display correctly if the flash plugin/add-on not installed or disabled.

Important Note:

If you get a message saying you are running without add-ons when you start Internet Explorer, then Internet Explorer is opened with add-ons disabled. To run Internet Explorer normally (with add-ons turned on), make sure to select Internet Explorer on the Start menu and do not click Internet Explorer (No Add-ons).

To enable Internet Explorer add-ons:

If you are getting a balloon tip at the status bar of internet explorer saying add-on disabled(as shown above in picture).Then click on it and jump to step 3

otherwise

For Internet Explorer 8:

1. Open Internet Explorer by clicking the Start button , and then clicking Internet Explorer.

2. Click the Tools button or Press Alt+T to open Tools menu and select Manage Add-ons.

Internet Explorer manage add-ons

3.Click the add-on you want to enable, and then click Enable.

Internet Explorer enable add-ons

Repeat step 3 for every add-on you want to enable. When you are finished, click Close.

To enable an add-on in Internet Explorer 7

1. Open Internet Explorer by clicking the Start button , and then clicking Internet Explorer.

2. Click the Tools button or Press Alt+T to open Tools menu and point to Manage Add-ons, and then click Enable or Disable Add-ons.

3. In the Show list, click Add-ons that have been used by Internet Explorer to display all add-ons.

4. Click the add-on you want to enable, and then click Enable.

5. Repeat step 4 for every add-on you want to enable. When you are finished, click OK.

Enabling Remote Desktop in Windows XP

What is Remote Desktop?

With Remote Desktop, you can have access to a Windows session that is running on your computer when you are at another computer. This means, for example, that you can connect to your work computer from home and have access to all of your programs, files, and network resources as though you were sitting at your computer at work. You can leave programs running at work and when you get home, you can see your work desktop displayed on your home computer, with the same programs running.

When you connect to your computer at work, Remote Desktop automatically locks that computer so that no one else can access your programs and files while you are gone. When you come back to work, you can unlock your computer by pressing CTRL+ALT+DEL.

You can keep your programs running and preserve the state of your Windows session while another user is logged on. When that user logs off, you can reconnect to your session in progress.

Remote Desktop can be used in many situations, including:

  • Working at home. Access work in progress on your office computer from home, and have full access to all local and remote devices.
  • Collaborating. Access your desktop from a colleague's office to work together on projects such as updating a slide presentation or proofreading a document.
  • Sharing a console. Allow multiple users to maintain separate program and configuration sessions on a single computer, such as at a teller station or a sales desk.

To use Remote Desktop, you need:

  • A computer ("host" computer) running Windows XP Professional with Service Pack 2 or higher or Windows Server 2003 with Service Pack 2 or higher ("remote" computer) with a connection to a local area network (LAN) or the Internet.
  • A second computer ("client" computer) with access to the LAN via a network connection, modem, or virtual private network (VPN) connection. This computer must have Remote Desktop Connection installed.
  • Appropriate user accounts and permissions.

Now here is the step by step guide for enabling remote Desktop.

  • Click Start and then Click Run.

Start Button

  • Type gpedit.msc in Run, and click the OK button.

services.msc

  • The Group Policy Window will appear. Now click on the “+” sign of Administrative Templates( or double click) under Computer configuration in the left columns to expand it and then again click on the “+” sign of Windows Components under Administrative Templates to expand it.select/click Terminal Services(see the image below).
  • Now double click on “Allow users to connect remotely using Terminal Services” in the right column to open its properties. (as shown in the picture)

Group Policy Remote Desktop

  • Then select Enabled radio button from Allow users to connect remotely using Terminal Services Properties and click the OK button. (as shown in the picture).

Group Policy Enable Remote Desktop

  • Its done.