Custom Search
Showing posts with label Tweaks. Show all posts

To show file and folder tasks in Windows Explorer

Every Windows folder provides easy access to common file and folder management tasks. When you open any folder on your computer, a list of hyperlinked tasks is displayed next to the folder contents. You can select a file or folder, and then click a task to rename, copy, move, or delete it. You can also send a file in e-mail or publish it to the Web.

By Default Windows do not show Common Tasks in Windows Explorer.

To show Common File and Folder Tasks in Windows Explorer.

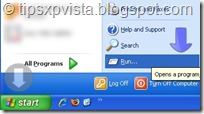
  1. Click Start, and then Click Run. Start Button
  2. Type Explorer in Run command box and click the OK button to open Windows Explorer. To Show common file and folder tasks
  3. Click the Close button  in the right corner of the Folders list to show Common File and Folder Tasks. Common File and Folder Tasks shown

To make all folder views the same in Windows XP

Windows provides several new ways for you to arrange and identify your files when viewing them in Folders, such as My Documents. When a folder is open, you can access each of the following view options on the View menu.

Show in Groups:

Show in Groups allows you to group your files by any detail of the file, such as name, size, type, or date modified. For example, if you group by file type, image files appear in one group, Microsoft Word files appear in another group, and Excel files in another. Show in Groups is available in the Thumbnails, Tiles, Icons, and Details views. To show your files in groups, on the View menu, point to Arrange Icons by, and then click Show in Groups.

Thumbnails:

Thumbnails view displays the images a folder contains on a folder icon so you can quickly identify the contents of the folder. For example, if you store pictures in several different folders, in Thumbnails view, you can tell at a glance which folder contains the pictures you want.

Windows displays up to four images on a folder background, by default. Or, you can choose one picture to identify a folder in Thumbnails view. The complete folder name is displayed under the thumbnail.

Tiles:

Tiles view displays your files and folders as icons. The icons are larger than those in Icon view, and the sort information you select is displayed under the file or folder name. For example, if you sort your files by type, "Microsoft Word document" appears under the file name for a Microsoft Word document.

Filmstrip:

Filmstrip view is available in picture folders. Your pictures appear in a single row of thumbnail images. You can scroll through your pictures using the left and right arrow buttons. If you click a picture, it is displayed as a larger image above the other pictures. To edit, print, or save the image to another folder, double-click the picture.

Icons:

Icons view displays your files and folders as icons. The file name is displayed under the icon; however, sort information is not displayed. In this view you can display your files and folders in groups.

List:

List view displays the contents of a folder as a list of file or folder names preceded by small icons. This view is useful if your folder contains many files and you want to scan the list for a file name. You can sort your files and folders in this view; however, you cannot display your files in groups.

Details:

In Details view, Windows lists the contents of the open folder and provides detailed information about your files, including name, type, size, and date modified. In Details view you can also show your files in groups.

To choose the details you want to display, on the View menu, click Choose Details.

But what if you want to set all folder view setting to Icons or Tiles? You have to open everyfolder and change its setting. But windows XP provide an easy way to change all folder view setting in just 3 steps.

To make all folder views the same

  1. Open a folder and select a folder view. Choosing Folder View
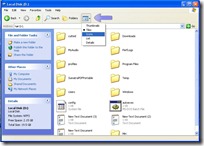
  2. On the Tools menu, click Folder Options. Opening Folder Options
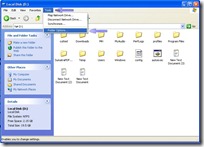
  3. On the View tab, click Apply to All Folders. and Click the OK button.To Make all folder veiws the same

Note:

  • To reset all folders to the settings that were in effect when Windows XP was installed, click Reset All Folders.

Changing the Defualt program for opening a file

Sometimes you install a software(for example an image viewer) and it get associated with its supported formats automatically. Whenever you open those files (images,pictures etc) they will be opened by the new software you have just installed. But you may like to open them with your old software.

For example you have installed an image viewer/editor like Photo Perfect Express or FastStone Image viewer and it associated with all image types. Whenever you open an image file, it will be opened by above mentioned software's. But suppose you are satisfied with the windows default image viewer like Paint and Windows Picture and Fax viewer and you want to open Picture files always with them NOT with any other software.

Then this tip is for you.

To change the program that opens a file

  1. Right-click the file you want to open in a different program, and then click Properties. File Properties Menu
  2. On the General tab, click Change. Change the defualt Program for opening files
  3. Click the name of the program in which you want the file to open. Choosing defualt Program to open files

Notes:

  • This change affects all files that have the same file name extension as the file you selected. For example, if you change the program that opens a .jpg file, all .jpg files will open in this program.
  • You can also change the program that opens a file by right-clicking the file, clicking Open With, and then clicking the program name. If the program you want is not displayed, click Browse.

Adding "My Computer" to Windows Taskbar for Faster access

If you access different files from your hard drive often then you know what you have to do every time. You have to open my computer then c:/d/ or other drive and then the folder in which file is stored.

What if you could access them without opening my computer?

that’s my today’s tip.

You could access all contents of My computer from your taskbar through a cascading menu.

Here is how:

  • Right click on Taskbar and point to Toolbars from Right click menu and then select New Toolbar.. from sub Menu

Creating New Toolbar

  • Now Create New Toolbar Dialogue box will appear. Select My Computer from it and click the OK button.

My Computer Toobar

  • This will create a cascading menu near the Clock, from where you can easily access just about anything on your System.

My Computer Cascading Menu

  • Its done.

How to Create a Shortcut on the Desktop

There are always some files which you use most often then others.You always need to open these files/folder by going to their original location.It may frustrate you.

What if you don't need to go to their original location to open them,access that file/folder in just one step

How? By creating a shortcut of that file/folder to your desktop.

Here is the step by step guide to create a shortcut to your desktop

  • First go to the location of the file/folder of which you want to create shortcut.
  1. Open My Computer.
  2. Double-click a drive or folder.
  • select the file/folder and right click on it.
  • select send to from Right click menu and then desktop(create shortcut)from sub menu.

Create desktop shortcut

  • Its done.

Now whenever you want to access them just click on its shortcut at your desktop and it will open instantly.

Note:

When you delete a shortcut to an item, the original item is not deleted. It still exists on your computer in its original location.

Changing Windows Star Menu Style

Windows XP has a new Start Menu style, which looks good and easy. But some people still prefer to view/use the Start menu in classic (Win98/2000) style.

Also the new Start Menu look is heavy on system resources and may slow down your PC if you have an old PC.

To change the Start menu style:

  • Right-click the Start button, and then click Properties.

Start Menu Properties On the Start Menu tab, click one of the following options:

  • To select the style from an earlier version of Windows, click Classic Start menu.
  • To revert back to the default Start menu, click Start menu.

Classic Start Menu

  • The next time you click Start, the Start menu displays the new style.

Start Menu Classic style

  • Its done.

Delete files without moving them to Recycle Bin

Whenever you delete files they first go to recycle bin and then you have to open recycle bin to delete files permanently.

Suppose you have some extremely private files, you deleted them and You forget to empty the recycle bin, Then someone from your home/office who has access to that PC may restore them and open those files.

But you may delete files permanently without sending them to recycle bin.

There are two ways to do this. One is a selective method and second is permanent.

method 1: Its for those who only want to delete there chosen files permanently and other files goes to recycle bin.

  • To delete a file permanently first select the file.
  • After selecting it press Shift+delete key to delete it permanently.Deleting Files permanently

OR

  • Right click on the file and select delete from right click menu while holding shift key.
  • confirm the file deletion by pressing Yes button.

method 2: Its for those who always wanted to delete files permanently without sending them to recycle bin.To do so

  • Right click on Recycle Bin icon on your windows desktop.
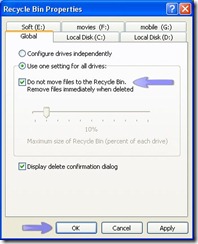
  • Select Properties from Right Click menu. Recycle Bin Properties
  • Check (√) the box named "Do not move files to the recycle bin.Remove files immediately when deleted".
  • click the OK button and its done

Recycle Bin permanent file deletion

Now every file will be deleted without moving to Recycle Bin.

Enable/Disable Windows Task Manager

Task Manager provides information about programs and processes running on your computer. It also displays the most commonly used performance measures for processes.

You can use Task Manager to monitor key indicators of your computer's performance. You can see the status of the programs that are running and end programs that have stopped responding. You can also assess the activity of running processes using as many as fifteen parameters, and see graphs and data on CPU and memory usage.

In addition, if you are connected to a network, you can view network status and see how your network is functioning.

If you have more than one user connected to your computer, you can see who is connected, what they are working on, and you can send them a message.

Sometimes it got disabled by viruses and you cannot use it.

To Disable/Enable Windows Task Manager

  • Click Start and then Click Run.

Start Button

  • Type gpedit.msc in Run, and click the OK button.

services.msc

  • The Group Policy Window will appear. Now click on the “+” sign of Administrative Templates( or double click) under User configuration in the left columns to expand it and then again click on the “+” sign of System under Administrative Templates to expand it.select/click Ctrl+Alt+Del Options (see the image below).
  • Now double click on “Remove Task Manager” in the right column to open its properties. (as shown in the picture)task manager
  • Then select Disabled radio button from Remove Task Manager Properties to enable it OR Enabled to disable windows Task Manager.Click the OK button. (as shown in the picture).Enable Windows Task manager
  • It Done.

Important Note:

Above method is for Windows XP Professional users.If you are using Windows XP Home or you are having trouble with above method you may download this small utility to enable it.

Enabling Internet Explorer add-ons

What are Web browser add-ons?

Web browser add-ons add features (for example, extra toolbars, animated mouse pointers, stock tickers, and pop-up ad blockers) to your web browser.

Some websites will not browse correctly if their required add-ons are not installed or they get disabled.

Internet Explorer add-on disabled

For example a website with flash content will not display correctly if the flash plugin/add-on not installed or disabled.

Important Note:

If you get a message saying you are running without add-ons when you start Internet Explorer, then Internet Explorer is opened with add-ons disabled. To run Internet Explorer normally (with add-ons turned on), make sure to select Internet Explorer on the Start menu and do not click Internet Explorer (No Add-ons).

To enable Internet Explorer add-ons:

If you are getting a balloon tip at the status bar of internet explorer saying add-on disabled(as shown above in picture).Then click on it and jump to step 3

otherwise

For Internet Explorer 8:

1. Open Internet Explorer by clicking the Start button , and then clicking Internet Explorer.

2. Click the Tools button or Press Alt+T to open Tools menu and select Manage Add-ons.

Internet Explorer manage add-ons

3.Click the add-on you want to enable, and then click Enable.

Internet Explorer enable add-ons

Repeat step 3 for every add-on you want to enable. When you are finished, click Close.

To enable an add-on in Internet Explorer 7

1. Open Internet Explorer by clicking the Start button , and then clicking Internet Explorer.

2. Click the Tools button or Press Alt+T to open Tools menu and point to Manage Add-ons, and then click Enable or Disable Add-ons.

3. In the Show list, click Add-ons that have been used by Internet Explorer to display all add-ons.

4. Click the add-on you want to enable, and then click Enable.

5. Repeat step 4 for every add-on you want to enable. When you are finished, click OK.

Enabling cookies in internet Explore/Mozilla Firefox

Websites use cookies to offer a personalized experience to users and to gather information about website use. Many websites also use cookies to store information that provides a consistent experience between sections of the site, such as a shopping cart or customized pages. With a trusted website, cookies can enrich your experience by allowing the site to learn your preferences or allowing you to skip having to sign in every time you go to the website. However, some cookies, such as those saved by banner ads, might put your privacy at risk by tracking sites you visit.

If cookies are disabled you will not be able to browse some websites.

To enable cookies in Internet Explorer.

  • Run Internet Explorer and Press Alt+T to open Tools menu and select Internet options.

Internet Options

  • Now Choose the Privacy tab and drag the slide bar to Medium (recommended) and click the OK button. If you still receive the warning that Cookies are disabled then drag the slide bar down till end to apply accept all cookies setting(not recommended).

internet Explorer Privacy setting

To enable cookies in Mozilla Firefox

  • Run Mozilla Firefox and Press Alt+T or click on Tools from Firefox Menu Bar and select Options.

Firefox Options

  • Now Mozilla Firefox Options window will be opened. Select Privacy tab and check the Accept cookies from sites checkbox.

Enable cookies Mozilla Forefox

  • Click the OK button and its done.

Enabling JavaScript in Internet Explorer/Mozilla Firefox

JavaScript is a scripting language commonly used in WebPages. Many website you visit require JavaScript to be enabled, otherwise you will not be able to browse them.

To enable JavaScript in Internet Explorer.

  • Run Internet Explorer and Press Alt+T to open Tools menu and select Internet options.

Internet Options

  • Now Choose the Security tab and click on Custom Level button.

Security Custom Level

  • Security setting will be opened.Now scroll down until you find Scripting and select Enable.

Enable JavaScript internet Explorer

  • Click the OK button and its done.

To enable JavaScript in Mozilla Firefox

  • Run Mozilla Firefox and Press Alt+T or click on Tools from Firefox Menu Bar and select Options.

Firefox Options

  • Now Mozilla Firefox Options window will be opened. Select Content tab and check the Enable JavaScript box.

Enable JavaScript Mozilla Forefox

  • Click the OK button and its done.

How to change Windows XP language

With Regional and Language Options in Control Panel, you can change the format Windows uses to display dates, times, currency amounts, large numbers, and numbers with decimal fractions.

You can also choose from a large number of input languages and text services, such as different keyboard layouts, Input Method Editors, and speech and handwriting recognition programs. When you switch to another input language, some programs offer special features, such as font characters or spelling checkers designed for different languages.

By default, products in the Windows .NET Server family install the files for most input languages supported by Windows. However, if you want to enter or display text in the East Asian languages (Chinese, Japanese, or Korean) or the complex script and right-to-left languages (Arabic, Armenian, Georgian, Hebrew, the Indic languages, Thai, or Vietnamese), you can install the language files from the Windows CD-ROM or, if applicable, a network.

Each language has a default keyboard layout, but many languages have alternate versions. Even if you do most of your work in one language, you might want to try other layouts. In English, for example, typing letters with accents might be simpler with the U.S.-International layout.

Important Note: This will only change the input format for number, currency, time, and date settings in Windows not The menus and Interface. If you want to chnage Menus/Interface/other setting also please visit the following link

Convert Windows to your Native Language with LIP

To change the Windows XP language

  • Click Start and then Click Run.

Start Button

  • Type intl.cpl in Run, and click the OK button to open Windows Regional and Language Options.

opening Regional and Language Options

  • Now if you want to change the language to Chinese, Japanese, Korean, Arabic, Armenian, Georgian, Hebrew, the Indic languages, Thai, or Vietnamese then you need to install them first. To install these languages Click on the Languages tab.
  • There you will see two checkboxes under Supplemental language support.If you want to install Arabic, Armenian, Georgian, Hebrew, the Indic languages, Thai, or Vietnamese tick (√) the first checkbox named Install Files for Complex script and right-to-left languages(including Thai) or if you want to install Chinese, Japanese or Korean than tick (√) the second checkbox named Install files for East Asian languages, Insert the Windows XP Setup Disk and click the apply button. After installation restart the computer and then open the Regional and Language Options again.

Installing Languages

  • Now select your desired language (for example Urdu) from drop down menu from Regional Options to change the default language format for number, currency, time, and date settings and click the Ok button and its done.

Change Windows XP Language

  • Now you will see a language Bar/icon in your taskbar near System Tray. English(or any other Default language of Windows) will remain the default language for writing. Whenever you want to type/write something in you own language just press Left Alt+Shift OR select the language from language Bar (as shown below) to switch to your chosen language.

Switching Language

Disable/Enable Windows Security Center

Windows Security Center checks the status of your computer for the three security essentials listed below. If a problem is detected with any of the three essentials (for example, if your antivirus program is out of date), the Security Center sends you an alert and provides recommendations for how to better protect your computer.

  • Firewall: A firewall helps protect your computer by preventing unauthorized users from gaining access to it through a network or the Internet. Windows checks to see if your computer is protected by a software firewall.
  • Virus protection software: Antivirus software can help protect your computer against viruses and other security threats. Windows checks to see if your computer is using a full, up-to-date antivirus program.
  • Automatic Updates: With Automatic Updates, Windows can routinely check for the latest important updates for your computer and install them automatically.

The Security Center can also help you:

  • Find out about the latest viruses or other security threats.
  • Get customer support from Microsoft for a security-related issue.

Why disable it?

If you are an experienced computer user and you are familiar with Antivirus, Firewall, Windows Update, and you dont like the annoying Windows Security center icon in your Windows System tray then you may want to disable it.

and there could be other reasons too.

windows securit center icon

To Disable Windows Security center in Windows XP:

  • Click Start and then Click Run.

Start Button

  • Type services.msc in Run, and click the OK button.

services.msc

  • The services Window will appear. Now double click on “Security Center” to open its Properties. (as shown in the picture)

Services Security center

  • Now Form Security Center Properties click on Startup Type Drop Down Box and select Disabled and click the OK button. (as shown in the picture) and its done.
  • There will be no more Security center icon in your System Tray.

Security center disabled

  • To enable it again just Select Enabled instead of Disabled in above step.

Disabling Microsoft Windows Defender

Windows Defender is free and useful antispyware security tool from Microsoft. (Don't know what is Windows Defender? Click here to Know). But is some conditions you may want to disable it because

  • You have anoteher antispyware tool and you prefer to use it, then its better to disable Windows Defender to prevent from conflict.
  • You have some adware (adware are free but advertising-supported software their ads must be running to run those software) software and Windows Defender is not allowing you to run those software.
  • or you may have any other reason

Now here is the step by step guide to disable it

First to open Windows Defender

in Windows XP

  • Click the Start >All Progrmas and click on Windows Defender to open it

In Windows Vista and Windows 7

  • Click the Start button and type windows defender in search programs and files box and hit the Enter key or select it from menu (as shown below) to run it.

Windows 7 Defender

Now to disable Windows defender.

  • After running Windows defender, Click on Tools and the select Options from Tools Window.

Windows Defender Options

  • Now select Administrator from left column of Options,uncheck Use this program checkbox and click on Save button.

Screenshot - 4_12_2009 , 12_15_19 PM

  • If User Access/Account Control is turned on you will need to confirm the setting by clicking Yes .
  • Now you will receive a notification that This program is turned off, click the close button and its done.

Windos defender turned off notification

Disable/Enable System Restore in Windows

System Restore is a component of Windows, that you can use to restore your computer to a previous state, if a problem occurs, without losing your personal data files (such as Microsoft Word documents, browsing history, drawings, favorites, or e-mail). System Restore monitors changes to the system and some application files, and it automatically creates easily identified restore points. These restore points allow you to revert the system to a previous time. They are created daily and at the time of significant system events (such as when an application or driver is installed). You can also create and name your own restore points at any time.

Why you will need to disable it?

Well, Its a great and important feature of windows, but in some conditions you will need to disable it, such as

  • You computer is infected with a virus and you want to remove the virus, but if the System Restore is enabled, the virus cannot be removed completely because System Restore will make a backup of the infected system files in the PC.
  • You are running out of Disk space. System Restore takes space in your Hard Drive to make backup of System changes. You can recover free Disk space by Turning System Restore Off.

Now here is the step by step guide to Enable/Disable System Restore.

  • Click the Start button and then point to My Computer in Start Menu.
  • Right Click on My Computer icon and select properties from right Click menu to open System Properties.

My Computer in Start Menu

  • Now click on the System Restore tab in System Properties to open System Restore Setting.
  • If you want to Turn Off System Restore on all drives just Check (√) the box named Turn Off System Restore in the System Restore Properties and click the OK button.

Screenshot - 3_29_2009 , 2_45_19 PM

  • But if you want to Turn off system Restore to a specific drives (e.g to Drive E only), select the drive from Available drives box and select setting.

System Restore specific drive

  • From setting dialogue box Check (√) the Turn off System Restore on this drive checkbox and click the OK button

Turn off System Restore specific drive

  • If you want to re-enable the System Restore feature of Windows just uncheck the the box named Turn off System Restore in the System Restore Properties and click the OK button.