Custom Search
Showing posts with label Folder Tasks. Show all posts

To show file and folder tasks in Windows Explorer

Every Windows folder provides easy access to common file and folder management tasks. When you open any folder on your computer, a list of hyperlinked tasks is displayed next to the folder contents. You can select a file or folder, and then click a task to rename, copy, move, or delete it. You can also send a file in e-mail or publish it to the Web.

By Default Windows do not show Common Tasks in Windows Explorer.

To show Common File and Folder Tasks in Windows Explorer.

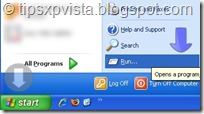
  1. Click Start, and then Click Run. Start Button
  2. Type Explorer in Run command box and click the OK button to open Windows Explorer. To Show common file and folder tasks
  3. Click the Close button  in the right corner of the Folders list to show Common File and Folder Tasks. Common File and Folder Tasks shown
Copying Files/Folders to another location

Most Windows tasks involve working with files and folders. Windows uses folders to provide a storage system for the files on your computer, just as you use manila folders to organize information in a filing cabinet.

Folders can contain many different types of files, such as documents, pictures, videos, and programs. You can copy and move files from other locations, such as another folder, computer, or the Internet, to folders you create. You can even create folders within folders.

To copy files/folders to another location:

  • First go to the location of the file/folder which you want to copy.(For example you want to copy “Intel” folder from C Drvie)
  • Click the file or folder you want to copy.
  • Under File and Folder Tasks, click Copy this file or Copy this folder. Copying folder
  • Copy Items dialog box will appear.Select the destination Drive/Folder where you want to copy the file/folder and click on Copy button.

Copy Items

  • The file will be copied to your selected location.

Adding "My Computer" to Windows Taskbar for Faster access

If you access different files from your hard drive often then you know what you have to do every time. You have to open my computer then c:/d/ or other drive and then the folder in which file is stored.

What if you could access them without opening my computer?

that’s my today’s tip.

You could access all contents of My computer from your taskbar through a cascading menu.

Here is how:

  • Right click on Taskbar and point to Toolbars from Right click menu and then select New Toolbar.. from sub Menu

Creating New Toolbar

  • Now Create New Toolbar Dialogue box will appear. Select My Computer from it and click the OK button.

My Computer Toobar

  • This will create a cascading menu near the Clock, from where you can easily access just about anything on your System.

My Computer Cascading Menu

  • Its done.

How to Create a Shortcut on the Desktop

There are always some files which you use most often then others.You always need to open these files/folder by going to their original location.It may frustrate you.

What if you don't need to go to their original location to open them,access that file/folder in just one step

How? By creating a shortcut of that file/folder to your desktop.

Here is the step by step guide to create a shortcut to your desktop

  • First go to the location of the file/folder of which you want to create shortcut.
  1. Open My Computer.
  2. Double-click a drive or folder.
  • select the file/folder and right click on it.
  • select send to from Right click menu and then desktop(create shortcut)from sub menu.

Create desktop shortcut

  • Its done.

Now whenever you want to access them just click on its shortcut at your desktop and it will open instantly.

Note:

When you delete a shortcut to an item, the original item is not deleted. It still exists on your computer in its original location.

Renaming photos, folders in Windows

Shoe boxes are great - for storing shoes. But cramming them with photo envelopes makes it tough to find what you're looking for quickly. Windows XP takes the guesswork out of finding digital pictures by automatically naming photos according to the date you transfer them to your computer. This makes them easy to search for if you remember when you took them. To make it easier still, Windows XP enables you to rename individual photos or entire subfolders with memorable names, like "graduation".

Here's how:

Renaming photos or folders

  1. Click Start, and then click My Pictures.
  2. Click the photo or folder you want to rename.
  3. Do one of the following:
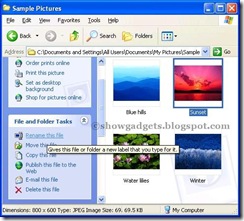
  • To rename a file, under File and Folder Tasks, click Rename this file.
  • To rename a folder, under File and Folder Tasks, click Rename this folder.

4.Type a new name for the photo or folder, and then press ENTER.