Custom Search

Removing Recycle Bin from Windows Desktop/Explorer

Well, Think of the situation you have deleted some most personal/private files from your computer in your office, but you forget to empty the Recycle Bin. and some one get these files, It will be be nightmare.

So here comes the solution. Remove the Recycle Bin icon from your PC Temp or permanently (depends on your needs).

This setting removes the Recycle Bin icon from the desktop, from Windows Explorer, from programs that use the Windows Explorer windows, and from the standard Open dialog box.

This setting does not prevent the user from using other methods to gain access to the contents of the Recycle Bin folder.

Note: To make changes to this setting effective, you must log off and then log back on.

Now here is the step by step guide for removing Recycle Bin icon.

Click Start and then Click Run.

Start Button

  • Type gpedit.msc in Run, and click the OK button.

services.msc

  • The Group Policy Window will appear. Now click on the “+” sign of Administrative Templates( or double click) under User configuration in the left columns to expand it and select/click Desktop(see the image below).
  • Now double click on “Remove Recycle Bin icon from desktop” to open its properties. (as shown in the picture)

deleting recycle bin desktop

  • Then select Enabled radio button from Remove Recycle Bin icon from desktop Properties and click the OK button. (as shown in the picture) and its done.

deleting recycle bin desktop2

To restore Recycle Bin icon to Desktop:

To get back Recycle Bin icon to Desktop just select Disabled or Not configured Radio button in above step.

Disable Windows Error Reporting Service

You can use Windows Error Reporting to report computer problems to Microsoft.

Whenever a running program crash or close unexpectedly the Windows Error reporting tool appear and ask you whether you want to report this error to Microsoft. which is very annoying.

Whenever windows boot, Windows error reporting service loads, cause the slow startup, and also keep running in background and increase the load on your system.

Here is the step by step guide to disable windows error reporting.

1st method:

  • Click Start and then Click Run.

Start Button

  • Type services.msc in Run, and click the OK button.

services.msc

  • The services Window will appear. Now double click on “Error Reporting Service”. (as shown in the picture)

Error Reporting Service

  • Then select Disabled from Startup Type drop down menu in Error Reporting service properties and click the OK button. (as shown in the picture) and its done.

Error Reporting Service Properties 2nd Method:

  • Click start button and then right click on the My Computer icon in Start Menu and select Properties.

My Computer Properties

  • System Properties will be opened.Now click on the Advanced tab and click on the Error Reporting button.

Error Reporting button

  • Now select “Disable Error Reporting” radio button from Error Reporting Dialogue box, and click the OK button.

Error ReportingDialogue Box

Its done.

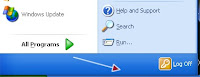
Removing/Restoring Shutdown button in StartMenu

Why you need to enable/Disable Shutdown Features of windows?

  • You want to enable the Shutdown Command

Because there are viruses which can disable Windows Shutdown. and you will not be able to Shutdown your Windows PC.

  • You want to Disable the Shutdown Command
  1. If you have a computer which should be always on. e.g. a Web Server.
  2. you want to prevent your Kids/friends/colleagues from shutting down the Windows because you are doing some important Takes, such as virus scanning, Disk Defragmenting, downloading or others, and shutdown can cause these tasks to start from beginning.

I will guide you step by step to Enable/disable Shutdown windows command.

  • Click Start and then Click Run.

Start Button

  • Type gpedit.msc in Run, and click the OK button. Running Group Policy Editor Command

  • The Group Policy window will open. Now click on the “+” sign of Administrative Templates( or double click) under User configuration in the left columns to expand it(see the image below).

  • Then Click/select Start Menu and Taskbar under Administrative Templates(see the image below).

  • Now double click on “Remove and prevent access to Shut Down command” to open its properties(see the image below) .

Restrict Shotdown Command

  • Now select “Enable” to Remove/Prevent access to Shutdown command and removing shutdown button from start menu OR Select Disabled to enable Shutdown command in windows/shutdown button in start menu, and click the OK button. (as shown in the picture below)

Disabled Windows Shutdown

Note: It will only works in Windows 2000/XP PRO, It will not work in XP Home edition.

Waiting for comments.